How to Integrate MangoProxy with Dolphin Anty
Blog » How to Integrate MangoProxy with Dolphin Anty
This 📔 guide provides detailed instructions for integrating 🔗 MangoProxy’s residential proxies with 🔥 Dolphin Anty browser profiles. This powerful combination gives you access to millions of residential IPs worldwide while maintaining unique browser fingerprints for each profile.
Benefits of Using MangoProxy with Dolphin Anty
- Enhanced Security: Each profile operates with a completely independent digital fingerprint and IP address
- Global Coverage: Access to over 90 million residential IPs from 190+ countries
- Reliable Connections: Stable residential proxies ensure consistent performance
- Reduced Ban Risk: Separate fingerprints and IPs minimize detection and blocking
- Scalability: Easily manage multiple accounts across different platforms
Step 1: Setting Up Your MangoProxy
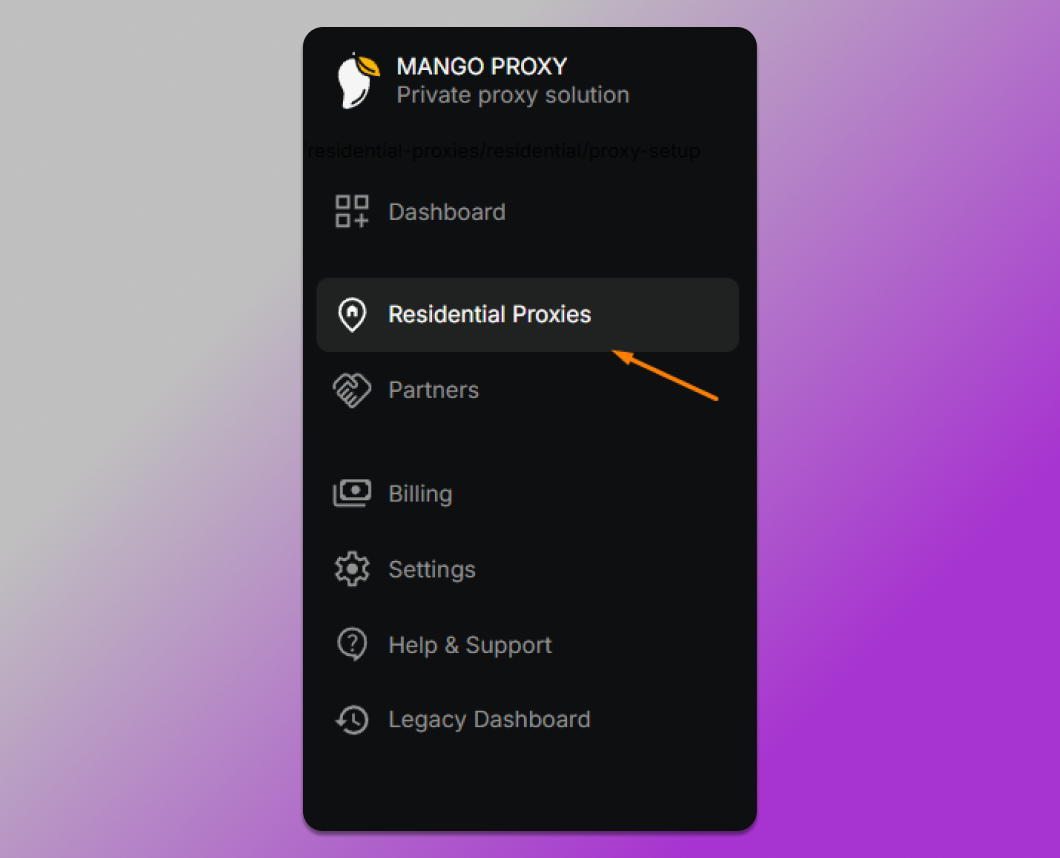
Step 1: Log into the Mango Proxy Control Panel
- Open the official Mango Proxy website and log into your account
- In the left navigation panel, find and click on 🏠 “Residential Proxies” as shown in the first screenshot (marked with an orange arrow)
Step 2: Configure Your Proxy Parameters
On the ⚙️ “Proxy Setup” page, configure the following parameters:

- Sub-account: Select an existing sub-account or create a new one using the dropdown menu
- Geographic settings (marked with orange arrows in the screenshot):
- Country: Select a specific country or leave “Global” for access to all countries
- State: Specify region/state if necessary
- City: Specify city if necessary
- Tip: For working with social media accounts, it’s recommended to choose a country corresponding to the region where the account was registered.
- Server: Choose the proxy server region (in the example, “Asia” is selected)
- ❗ Tip: For better speed, choose a server geographically closest to the target country of the IP address.
- Session duration: Set the session duration in minutes (marked with an orange arrow)
- Amount: Specify the number of simultaneous connections
After setting all parameters, click the ✅ Check button on the right side of the screen (marked with an orange arrow)
Step 3: Get Connection Data
After clicking the “Check” button, the system will verify the availability of proxies with the selected parameters and display a window with connection data:

- Select the tab with the desired connection protocol (as shown in the second screenshot, marked with an orange arrow):
- socks5 (recommended for most tasks)
- https
- http
- The system will display the connection data you’ll need for GeeLark setup:
- Protocol: the chosen protocol (in the example, socks5)
- Login: username for authorization
- Password: password for authorization
- Host: proxy server address (in the example, p2.mangoproxy.com)
- Port: connection port (in the example, 2333)
- Copy this data or the complete URL string by clicking on the copy icon (marked with an orange arrow on the right)
❗ Important tip: Save this configuration for future use by clicking the “Save To History” button at the top of the page. This allows you to quickly return to working settings.
Step 2: Configuring Dolphin Anty
- Create or edit a profile in 🔥 Dolphin Anty
-
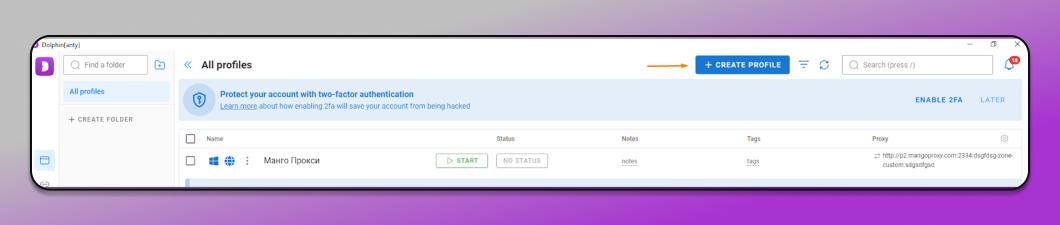
- Launch Dolphin Anty
- Click “CREATE PROFILE” button in the top right corner
- Fill in the basic profile information (name, tags, etc.)
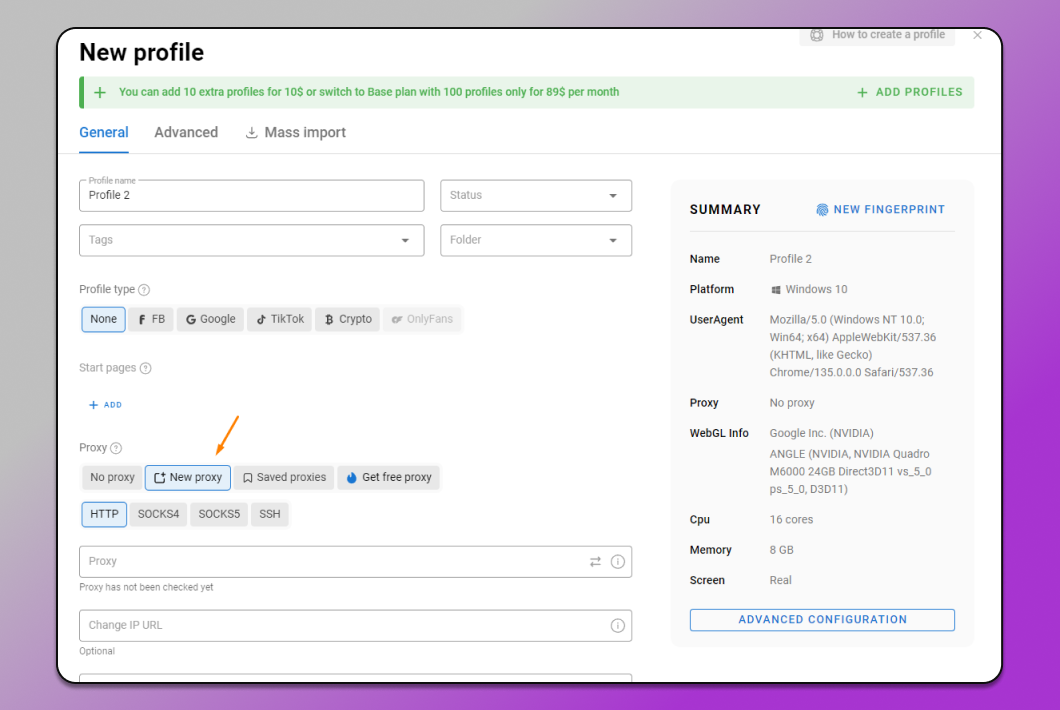
- Configure proxy settings
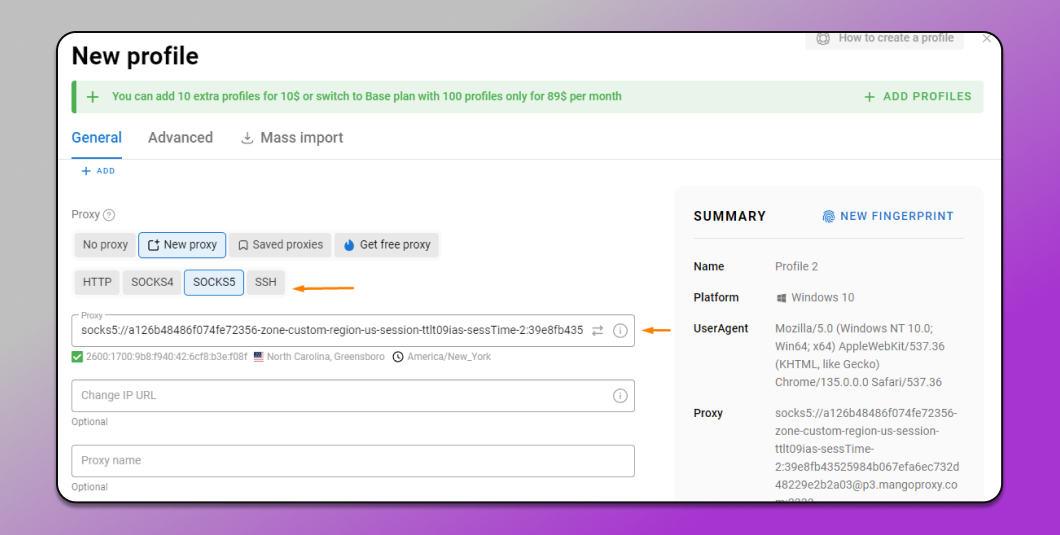
- In the profile creation/editing screen, navigate to the “Proxy” section
- Click “New proxy” button
- Select the appropriate proxy protocol:
- HTTP
- SOCKS4
- SOCKS5 (recommended)
- SSH
3. Enter MangoProxy details
-
- Enter your proxy string in the format:
- socks5://username:password@host:port
- Example: socks5://a126b48486f074fe72356-zone-custom-region-us-session-ttlt09ias-sessTime-2:39e8fb435@p3.mangoproxy.com:2333
- Optionally fill in “Change IP URL” if using rotating proxies
- Add a descriptive “Proxy name” for easier management (optional)
- Click the verification button to test your proxy connection
- Enter your proxy string in the format:
4. Complete profile setup and launch
-
- Finish configuring other profile settings as needed
- Save your profile
- Start the profile to begin browsing with your MangoProxy connection
Best Practices and Recommendations
📌 For Social Media Management
- Create separate proxies for each account
- Choose country IPs that match the account’s registration region
- Use different browser fingerprints for each profile
- Save successful configurations for future use
📌 For Multi-Account Management
- Organize profiles into folders by project or client
- Implement IP rotation schedules for high-security needs
- Document which proxy configurations work best for specific platforms
📌 For Web Scraping Projects
- Use proxies from diverse geographic locations
- Set appropriate session durations based on scraping volume
- Monitor proxy performance and adjust settings as needed
- Implement proper request delays to avoid detection
Troubleshooting Common Issues
- Connection Failures: Verify your username and password are correct
- Slow Performance: Try selecting a server location closer to your target website
- Unstable Connection: Increase session duration for more stability
- IP Blocks: Rotate to a different country/region if experiencing blocks
- Authentication Errors: Check that your proxy subscription is active
This integration provides a 💪 powerful solution for managing multiple online identities securely and efficiently while minimizing the risk of detection or blocking.